References
* [Travis CI Docs on npm Releasing](https://docs.travis-ci.com/user/deployment/npm/)
**Change log:**'${log// ### branches Here we tell Travis to trigger only on changes in `master` branch. Also, you have to configure Travis to build pushed pull requests(in the settings of your project). ___CODE_BLOCK_3___
 ### before_deploy
Here we just export `tag` and `body` as changelog (all new commits in `master` branch) of our future release in bash variables.
___CODE_BLOCK_4___
Notice that we have to replace all `'\n'` with `'
### before_deploy
Here we just export `tag` and `body` as changelog (all new commits in `master` branch) of our future release in bash variables.
___CODE_BLOCK_4___
Notice that we have to replace all `'\n'` with `''` in `body`. Otherwise, GitHub wouldn't show it properly. ### deploy Use following commands to setup deploy for **npm** and **GitHub** respectively: ___CODE_BLOCK_5___ This is a deploy provider for GitHub releases: ___CODE_BLOCK_6___ Remember that you deploy your package if only your master branch contains new release commit. Aslo, we create here new release tag. And that's a deploy provider for npm: ``` ### branches Here we tell Travis to trigger only on changes in `master` branch. Also, you have to configure Travis to build pushed pull requests(in the settings of your project). ___CODE_BLOCK_3___
 ### before_deploy
Here we just export `tag` and `body` as changelog (all new commits in `master` branch) of our future release in bash variables.
___CODE_BLOCK_4___
Notice that we have to replace all `'\n'` with `'
### before_deploy
Here we just export `tag` and `body` as changelog (all new commits in `master` branch) of our future release in bash variables.
___CODE_BLOCK_4___
Notice that we have to replace all `'\n'` with `''` in `body`. Otherwise, GitHub wouldn't show it properly. ### deploy Use following commands to setup deploy for **npm** and **GitHub** respectively: ___CODE_BLOCK_5___ This is a deploy provider for GitHub releases: ___CODE_BLOCK_6___ Remember that you deploy your package if only your master branch contains new release commit. Aslo, we create here new release tag. And that's a deploy provider for npm: ___CODE_BLOCK_7___ You can use command [`npm version`](https://docs.npmjs.com/cli/version.html) for creating release commit. As a result you get GitHub releases that look something like this: 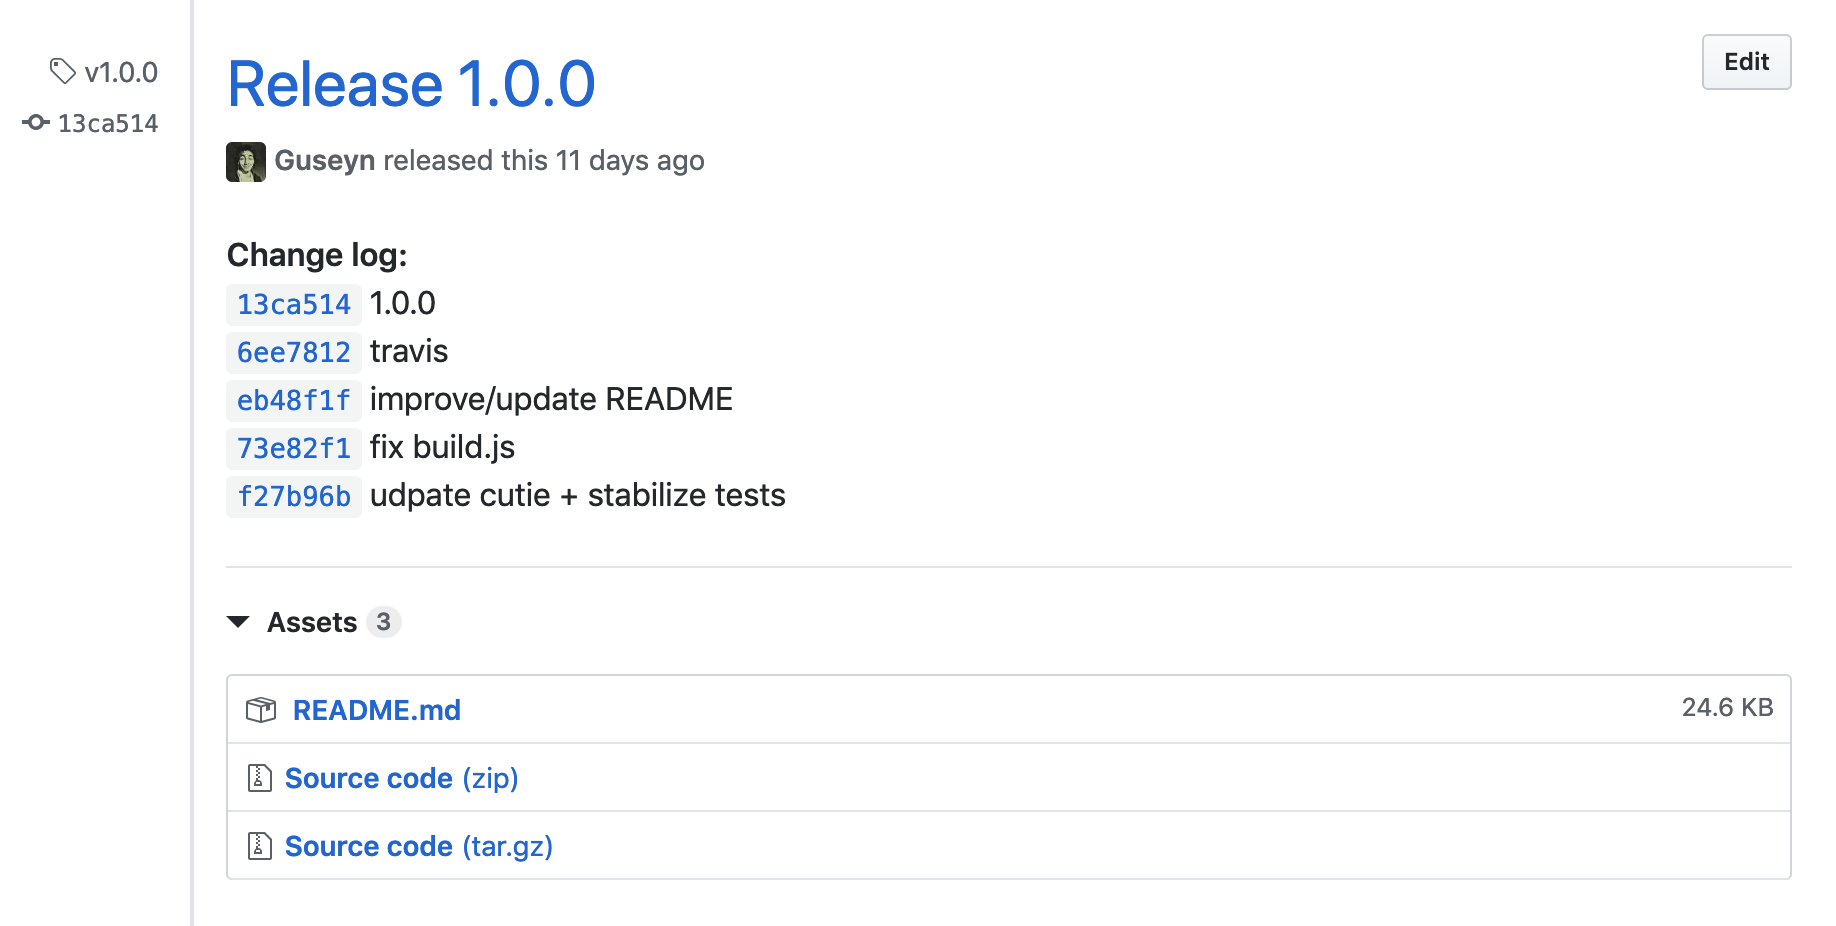 You might ask *"Why don't I use git tags for deploying?"*. Well, for some strange reason tags disappear after merging `release branch` into `master` and deployment does not run. I tried find out why this is happening, but with no results. If you have any ideas on this, please share in the comments. [Here](/yml/travis.yml) is complete configuration. **Update:** It's important to mention that you need to merge pull requests in github via option: "Rebase and merge". So, that's it. I hope you found this article useful.
References
* [Travis CI Docs on npm Releasing](https://docs.travis-ci.com/user/deployment/npm/)
v'$TRAVIS_COMMIT_MESSAGE
export BODY=
Notice that we have to replace all `'\n'` with `''` in `body`. Otherwise, GitHub wouldn't show it properly. ### deploy Use following commands to setup deploy for **npm** and **GitHub** respectively: ___CODE_BLOCK_5___ This is a deploy provider for GitHub releases: ___CODE_BLOCK_6___ Remember that you deploy your package if only your master branch contains new release commit. Aslo, we create here new release tag. And that's a deploy provider for npm: ___CODE_BLOCK_7___ You can use command [`npm version`](https://docs.npmjs.com/cli/version.html) for creating release commit. As a result you get GitHub releases that look something like this:  You might ask *"Why don't I use git tags for deploying?"*. Well, for some strange reason tags disappear after merging `release branch` into `master` and deployment does not run. I tried find out why this is happening, but with no results. If you have any ideas on this, please share in the comments. [Here](/yml/travis.yml) is complete configuration. **Update:** It's important to mention that you need to merge pull requests in github via option: "Rebase and merge". So, that's it. I hope you found this article useful.
References
* [Travis CI Docs on npm Releasing](https://docs.travis-ci.com/user/deployment/npm/)
**Change log:**'${log// ### branches Here we tell Travis to trigger only on changes in `master` branch. Also, you have to configure Travis to build pushed pull requests(in the settings of your project). ___CODE_BLOCK_3___
### before_deploy
Here we just export `tag` and `body` as changelog (all new commits in `master` branch) of our future release in bash variables.
___CODE_BLOCK_4___
Notice that we have to replace all `'\n'` with `''` in `body`. Otherwise, GitHub wouldn't show it properly. ### deploy Use following commands to setup deploy for **npm** and **GitHub** respectively: ___CODE_BLOCK_5___ This is a deploy provider for GitHub releases: ___CODE_BLOCK_6___ Remember that you deploy your package if only your master branch contains new release commit. Aslo, we create here new release tag. And that's a deploy provider for npm: ___CODE_BLOCK_7___ You can use command [`npm version`](https://docs.npmjs.com/cli/version.html) for creating release commit. As a result you get GitHub releases that look something like this:  You might ask *"Why don't I use git tags for deploying?"*. Well, for some strange reason tags disappear after merging `release branch` into `master` and deployment does not run. I tried find out why this is happening, but with no results. If you have any ideas on this, please share in the comments. [Here](/yml/travis.yml) is complete configuration. **Update:** It's important to mention that you need to merge pull requests in github via option: "Rebase and merge". So, that's it. I hope you found this article useful.
References
* [Travis CI Docs on npm Releasing](https://docs.travis-ci.com/user/deployment/npm/)
\n'/} ``` You can use command [`npm version`](https://docs.npmjs.com/cli/version.html) for creating release commit. As a result you get GitHub releases that look something like this: ) You might ask *"Why don't I use git tags for deploying?"*. Well, for some strange reason tags disappear after merging `release branch` into `master` and deployment does not run. I tried find out why this is happening, but with no results. If you have any ideas on this, please share in the comments. [Here](https://cdn.guseyn.com(/yml/travis.yml)) is complete configuration. **Update:** It's important to mention that you need to merge pull requests in github via option: "Rebase and merge". So, that's it. I hope you found this article useful.
References
* [Travis CI Docs on npm Releasing](https://docs.travis-ci.com/user/deployment/npm/)
\n'/} ___CODE_BLOCK_7___ ### branches Here we tell Travis to trigger only on changes in `master` branch. Also, you have to configure Travis to build pushed pull requests(in the settings of your project). ___CODE_BLOCK_3___
### before_deploy
Here we just export `tag` and `body` as changelog (all new commits in `master` branch) of our future release in bash variables.
___CODE_BLOCK_4___
Notice that we have to replace all `'\n'` with `''` in `body`. Otherwise, GitHub wouldn't show it properly. ### deploy Use following commands to setup deploy for **npm** and **GitHub** respectively: ___CODE_BLOCK_5___ This is a deploy provider for GitHub releases: ___CODE_BLOCK_6___ Remember that you deploy your package if only your master branch contains new release commit. Aslo, we create here new release tag. And that's a deploy provider for npm: ___CODE_BLOCK_7___ You can use command [`npm version`](https://docs.npmjs.com/cli/version.html) for creating release commit. As a result you get GitHub releases that look something like this: ) You might ask *"Why don't I use git tags for deploying?"*. Well, for some strange reason tags disappear after merging `release branch` into `master` and deployment does not run. I tried find out why this is happening, but with no results. If you have any ideas on this, please share in the comments. [Here](https://cdn.guseyn.com(/yml/travis.yml)) is complete configuration. **Update:** It's important to mention that you need to merge pull requests in github via option: "Rebase and merge". So, that's it. I hope you found this article useful.
References
* [Travis CI Docs on npm Releasing](https://docs.travis-ci.com/user/deployment/npm/)
**Change log:**'${log// Notice that we have to replace all `'\n'` with `'
'` in `body`. Otherwise, GitHub wouldn't show it properly. ### deploy Use following commands to setup deploy for **npm** and **GitHub** respectively: ___CODE_BLOCK_5___ This is a deploy provider for GitHub releases: ___CODE_BLOCK_6___ Remember that you deploy your package if only your master branch contains new release commit. Aslo, we create here new release tag. And that's a deploy provider for npm: ___CODE_BLOCK_7___ You can use command [`npm version`](https://docs.npmjs.com/cli/version.html) for creating release commit. As a result you get GitHub releases that look something like this: ) You might ask *"Why don't I use git tags for deploying?"*. Well, for some strange reason tags disappear after merging `release branch` into `master` and deployment does not run. I tried find out why this is happening, but with no results. If you have any ideas on this, please share in the comments. [Here](https://cdn.guseyn.com(/yml/travis.yml)) is complete configuration. **Update:** It's important to mention that you need to merge pull requests in github via option: "Rebase and merge". So, that's it. I hope you found this article useful.
References
* [Travis CI Docs on npm Releasing](https://docs.travis-ci.com/user/deployment/npm/)
**Change log:**'${log// ### branches Here we tell Travis to trigger only on changes in `master` branch. Also, you have to configure Travis to build pushed pull requests(in the settings of your project). ___CODE_BLOCK_3___
### before_deploy
Here we just export `tag` and `body` as changelog (all new commits in `master` branch) of our future release in bash variables.
___CODE_BLOCK_4___
Notice that we have to replace all `'\n'` with `''` in `body`. Otherwise, GitHub wouldn't show it properly. ### deploy Use following commands to setup deploy for **npm** and **GitHub** respectively: ___CODE_BLOCK_5___ This is a deploy provider for GitHub releases: ___CODE_BLOCK_6___ Remember that you deploy your package if only your master branch contains new release commit. Aslo, we create here new release tag. And that's a deploy provider for npm: ___CODE_BLOCK_7___ You can use command [`npm version`](https://docs.npmjs.com/cli/version.html) for creating release commit. As a result you get GitHub releases that look something like this: ) You might ask *"Why don't I use git tags for deploying?"*. Well, for some strange reason tags disappear after merging `release branch` into `master` and deployment does not run. I tried find out why this is happening, but with no results. If you have any ideas on this, please share in the comments. [Here](https://cdn.guseyn.com(/yml/travis.yml)) is complete configuration. **Update:** It's important to mention that you need to merge pull requests in github via option: "Rebase and merge". So, that's it. I hope you found this article useful.
References
* [Travis CI Docs on npm Releasing](https://docs.travis-ci.com/user/deployment/npm/)
\n'/} ``` ### branches Here we tell Travis to trigger only on changes in `master` branch. Also, you have to configure Travis to build pushed pull requests(in the settings of your project). ___CODE_BLOCK_3___
### before_deploy
Here we just export `tag` and `body` as changelog (all new commits in `master` branch) of our future release in bash variables.
___CODE_BLOCK_4___
Notice that we have to replace all `'\n'` with `''` in `body`. Otherwise, GitHub wouldn't show it properly. ### deploy Use following commands to setup deploy for **npm** and **GitHub** respectively: ___CODE_BLOCK_5___ This is a deploy provider for GitHub releases: ___CODE_BLOCK_6___ Remember that you deploy your package if only your master branch contains new release commit. Aslo, we create here new release tag. And that's a deploy provider for npm: ___CODE_BLOCK_7___ You can use command [`npm version`](https://docs.npmjs.com/cli/version.html) for creating release commit. As a result you get GitHub releases that look something like this:  You might ask *"Why don't I use git tags for deploying?"*. Well, for some strange reason tags disappear after merging `release branch` into `master` and deployment does not run. I tried find out why this is happening, but with no results. If you have any ideas on this, please share in the comments. [Here](/yml/travis.yml) is complete configuration. **Update:** It's important to mention that you need to merge pull requests in github via option: "Rebase and merge". So, that's it. I hope you found this article useful.
References
* [Travis CI Docs on npm Releasing](https://docs.travis-ci.com/user/deployment/npm/)
\n'/} ``` Notice that we have to replace all `'\n'` with `'
'` in `body`. Otherwise, GitHub wouldn't show it properly. ### deploy Use following commands to setup deploy for **npm** and **GitHub** respectively: ___CODE_BLOCK_5___ This is a deploy provider for GitHub releases: ___CODE_BLOCK_6___ Remember that you deploy your package if only your master branch contains new release commit. Aslo, we create here new release tag. And that's a deploy provider for npm: ___CODE_BLOCK_7___ You can use command [`npm version`](https://docs.npmjs.com/cli/version.html) for creating release commit. As a result you get GitHub releases that look something like this: ) You might ask *"Why don't I use git tags for deploying?"*. Well, for some strange reason tags disappear after merging `release branch` into `master` and deployment does not run. I tried find out why this is happening, but with no results. If you have any ideas on this, please share in the comments. [Here](https://cdn.guseyn.com(/yml/travis.yml)) is complete configuration. **Update:** It's important to mention that you need to merge pull requests in github via option: "Rebase and merge". So, that's it. I hope you found this article useful.
References
* [Travis CI Docs on npm Releasing](https://docs.travis-ci.com/user/deployment/npm/)
**Change log:**'${log// ### branches Here we tell Travis to trigger only on changes in `master` branch. Also, you have to configure Travis to build pushed pull requests(in the settings of your project). ___CODE_BLOCK_3___
### before_deploy
Here we just export `tag` and `body` as changelog (all new commits in `master` branch) of our future release in bash variables.
___CODE_BLOCK_4___
Notice that we have to replace all `'\n'` with `''` in `body`. Otherwise, GitHub wouldn't show it properly. ### deploy Use following commands to setup deploy for **npm** and **GitHub** respectively: ___CODE_BLOCK_5___ This is a deploy provider for GitHub releases: ___CODE_BLOCK_6___ Remember that you deploy your package if only your master branch contains new release commit. Aslo, we create here new release tag. And that's a deploy provider for npm: ___CODE_BLOCK_7___ You can use command [`npm version`](https://docs.npmjs.com/cli/version.html) for creating release commit. As a result you get GitHub releases that look something like this: ) You might ask *"Why don't I use git tags for deploying?"*. Well, for some strange reason tags disappear after merging `release branch` into `master` and deployment does not run. I tried find out why this is happening, but with no results. If you have any ideas on this, please share in the comments. [Here](https://cdn.guseyn.com(/yml/travis.yml)) is complete configuration. **Update:** It's important to mention that you need to merge pull requests in github via option: "Rebase and merge". So, that's it. I hope you found this article useful.
References
* [Travis CI Docs on npm Releasing](https://docs.travis-ci.com/user/deployment/npm/)
\n'/} ``` ### branches Here we tell Travis to trigger only on changes in `master` branch. Also, you have to configure Travis to build pushed pull requests(in the settings of your project). ___CODE_BLOCK_3___
### before_deploy
Here we just export `tag` and `body` as changelog (all new commits in `master` branch) of our future release in bash variables.
___CODE_BLOCK_4___
Notice that we have to replace all `'\n'` with `''` in `body`. Otherwise, GitHub wouldn't show it properly. ### deploy Use following commands to setup deploy for **npm** and **GitHub** respectively: ___CODE_BLOCK_5___ This is a deploy provider for GitHub releases: ___CODE_BLOCK_6___ Remember that you deploy your package if only your master branch contains new release commit. Aslo, we create here new release tag. And that's a deploy provider for npm: ___CODE_BLOCK_7___ You can use command [`npm version`](https://docs.npmjs.com/cli/version.html) for creating release commit. As a result you get GitHub releases that look something like this:  You might ask *"Why don't I use git tags for deploying?"*. Well, for some strange reason tags disappear after merging `release branch` into `master` and deployment does not run. I tried find out why this is happening, but with no results. If you have any ideas on this, please share in the comments. [Here](https://cdn.guseyn.com(/yml/travis.yml)) is complete configuration. **Update:** It's important to mention that you need to merge pull requests in github via option: "Rebase and merge". So, that's it. I hope you found this article useful.
References
* [Travis CI Docs on npm Releasing](https://docs.travis-ci.com/user/deployment/npm/)